
When it comes to improving the functionality and aesthetics of your home, metal roofing is a fantastic choice. It’s durable, weather-resistant, and adds a sleek modern look to your house. But if you’re taking the DIY route—or simply want to understand the process better—you might wonder, “How do I cut metal roofing correctly and safely?”
This blog will walk you through everything you need to know, from the tools required to a step-by-step guide on how to cut metal roofing like a pro. Here’s what we’ll cover:
- Essential tools you’ll need
- Step-by-step guide to cutting metal roofing
- Common mistakes to avoid
🛠️ Essential Tools You’ll Need

Before you begin, it’s important to have the right tools on hand to ensure your project goes smoothly and efficiently. Having the proper equipment not only makes the job easier but also helps you achieve professional, precise results. Cutting metal sheets requires accuracy, safety, and the right kind of tools for different types of cuts, whether they’re straight, curved, or detailed. Here’s what you’ll need:
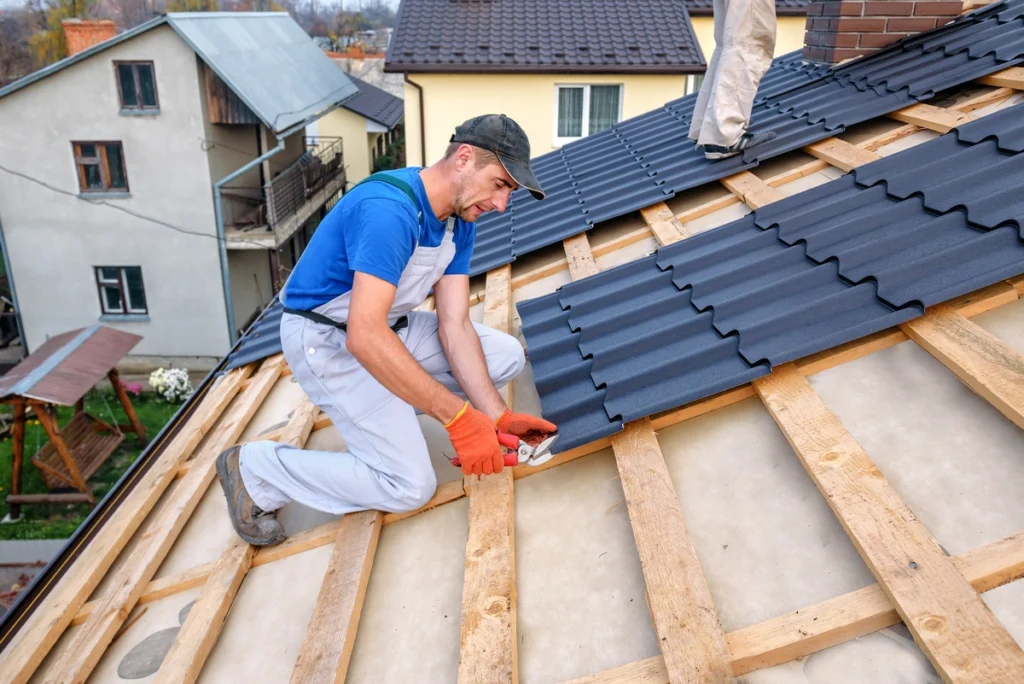
Metal snips are great for small, detailed cuts. Yellow-handled snips work best for straight cuts, while red and green snips are designed for left and right curved cuts. For larger, straight cuts, a circular saw with a metal cutting blade is your go-to tool. A jigsaw with a fine-tooth blade is ideal for intricate or smaller details.
Don’t forget the basics like a marker and measuring tape, as precision is crucial when marking where to cut. Clamps are also essential for keeping the metal sheet secure while you’re cutting, ensuring both safety and accuracy.
Safety Tips Before You Start
- Wear gloves to protect your hands from sharp edges.
- Put on goggles or safety glasses to avoid stray metal shards harming your eyes.
- Ensure a clean, safe workspace. Secure the roofing sheet to prevent movement during cutting.
- Check power tools for proper setup. Make sure blades are sharp and securely fixed to avoid slipping or malfunctions.
✅ 6 Step Guide to Cutting Metal Roofing

Follow these six steps for precise and clean cuts on your metal roof:
1. Prepare the Work Area
Start by laying your metal sheet flat on a sturdy workbench or sawhorses to ensure a stable surface for cutting. Once positioned, use clamps to secure the sheet firmly to the workbench or sawhorses. This step is critical to prevent the metal from shifting or moving while you’re cutting, which could lead to inaccurate cuts or potential safety hazards.
2. Measure and Mark
Carefully measure the area where the cut needs to be made using a measuring tape. Accurate measurements are crucial to achieving the desired fit. Once you’ve determined the precise dimensions, use a marker and a straight edge to draw a clear, visible line on the metal sheet. This line will serve as your cutting guide, so ensure it is straight and easy to follow.
3. Select the Right Cutting Tool
Choose the appropriate tool for the type of cut you need to make. For smaller, more detailed work, metal snips are the best option as they provide control and precision. For longer, straight cuts, consider using a circular saw or a nibbler, both of which are designed for efficient and clean cuts. Selecting the right tool is essential to ensure both the quality of the cut and your safety during the process.
4. Start Cutting
When you’re ready to cut, align the edge of your chosen tool with the marked line on the metal sheet. Begin cutting with firm and even pressure, taking care to move steadily along the guide line. Avoid rushing, as this can lead to jagged edges or uneven cuts. Consistency and control will result in a cleaner, more accurate cut.
5. Smooth the Edges (Optional)
After completing the cut, inspect the edges of the metal sheet. If they appear rough or sharp, use a deburring tool or sandpaper to smooth them out. This step not only improves the aesthetic of your cut but also removes any sharp edges that could pose a safety risk during handling or installation.
6. Inspect Your Work
Once the cutting and smoothing are complete, take a moment to inspect your work. Verify that the cuts match the required dimensions and are precise enough for their intended purpose. Ensuring accuracy at this stage will save time and effort later, especially if the piece needs to fit into a specific installation or assembly.
🚫 Common Mistakes to Avoid

Even the most experienced DIYers can make mistakes when cutting metal roofing. Avoid these pitfalls:
Not Measuring Properly
Accurate measurements are the foundation of any successful metal-cutting project. Failing to measure properly can lead to wasted materials, uneven cuts, or parts that simply don’t fit together. Always take the time to double-check your measurements before making any cuts. Use a reliable measuring tape or ruler, and mark your metal sheet clearly to ensure precision.
Skipping Safety Gear
Safety should always come first when working with metal. Skipping basic protective gear like gloves and goggles is a common but dangerous mistake. Sharp edges and flying metal fragments can cause serious injuries. Always wear thick gloves to protect your hands and safety goggles to shield your eyes from debris. Remember, staying safe is far more important than saving a few minutes.
Using Dull Tools
Using dull blades or tools can make cutting metal not only harder but also less effective. Dull tools tend to create jagged or uneven edges, which may ruin the quality of your work. Additionally, they can overheat or damage the material, making it even harder to complete your project. Regularly inspect your tools and replace or sharpen blades as needed for clean, precise cuts.
Rushing the Process
Metal cutting is not a task you should rush. Hurrying through the process can lead to mistakes like misaligned cuts or poor-quality results. Take your time to ensure each cut is clean and accurate. Patience and attention to detail will ultimately save you time and frustration by reducing the likelihood of errors.
Cutting Without Securing the Sheet
Failing to stabilize the metal sheet before cutting is a recipe for disaster. Unsecured sheets can shift, vibrate, or even slip entirely, leading to crooked cuts or hazardous situations. Always use clamps or a sturdy workbench to hold the metal firmly in place. Proper stabilization ensures both your safety and the accuracy of your cuts.
🏡 Cutting Metal Roofing
Cutting metal roofing can be a satisfying DIY project, but when it comes to ensuring precision, durability, and a flawless installation, the expertise of a professional team makes all the difference. At I AM Roofing, we combine high-quality materials, expert craftsmanship, and exceptional service to deliver roofing solutions you can rely on for years to come.
Whether you’re tackling a residential or commercial project, our veteran-owned, family-operated team is here to provide honest, disciplined, and skilled service every step of the way. Trust us to handle your roofing needs with professionalism and care. Ready to get started? Contact us today for a free inspection and experience the I AM Roofing difference!